Time: one hour
What you need:
-4×4 and 24×36 Sunprint paper
-4×4 acrylics
-cardboard
-tubs of water
-objects to print
Thanks to my little brother, I had the opportunity to do a project with the fourth and fifth grade gifted and talented class at Hidden Valley Elementary School in Martinez, California. It was both a lot of fun and a huge challenge! The class is only fifty minutes long, and since it was getting towards the end of the month, we were interrupted by a fire drill in the middle. The kids had a great time, though, and I really enjoyed seeing what ideas they came up with.
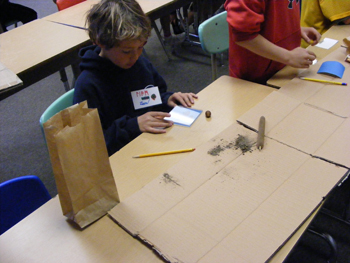
I went in to the school a few minutes early to set up the tubs of water, take the brown paper off the acrylics, and lay out the cardboard for drying the finished sunprints. After the kids came in and sat down, I asked if they knew what UV rays and chemical reactions were. A few did—I was surprised at their knowledge of the scientific processes, since I’m pretty sure I didn’t know what a molecular chemical reaction was when I was in fourth grade. I explained that the paper changed colors when it was in the sun due to a chemical reaction of the blue molecules to the UV rays, and then changed back from the reaction to the water bath at the end. The volunteer parents and I handed out pieces of 4×4 Sunprint paper to everyone, and had them all write their names on the back.
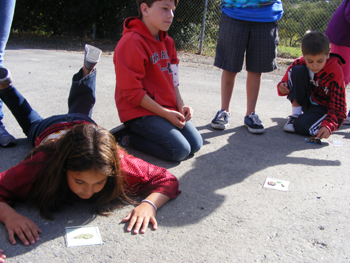
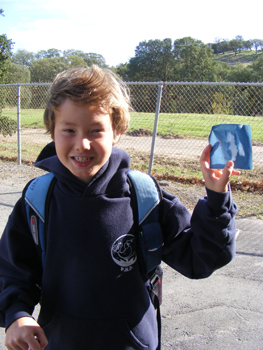
The week before, they had gone out into the field next to the school to search for interesting leaves, flowers, rocks, trash, and other objects to use for prints. Each student had their own bag with their collection, and I asked them all to go ahead and lay out their design on the paper while we were still inside, explaining that once we went out, the paper would expose very quickly.
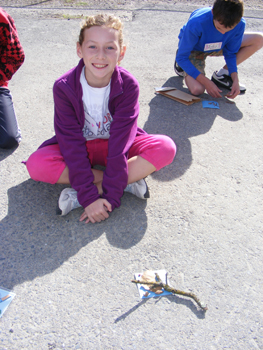
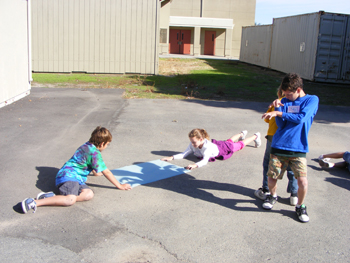
We split them in to two groups, and they went out on the patio next to the classroom to make their prints. They were really fascinated with watching the paper change color, and the way that the shadows of the objects meant that the print was not necessarily the same shape as the object itself. We trooped back in, and they rinsed their papers in the water bath and lay them out on the cardboard to dry. Then the fire alarm went off. When we got back, there were still about twenty minutes, so I divided them into pairs to use the master sheets.

They had a few minutes to talk about what kind of design they wanted to make, and did everything from making shapes with their bodies to putting objects or their own body parts directly on the paper to making shadow puppets and doing silly poses. This part was the biggest challenge, because while the sun was nice and bright, it was extremely windy that day, and the papers were blowing around. Also, as many of the groups discovered, some poses are hard to hold for three minutes while the paper exposes.
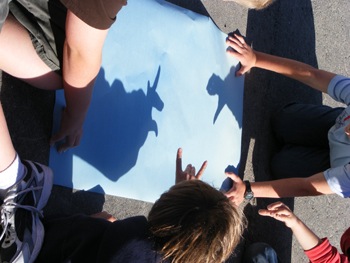
I paired each group with another group, and while one group did their pose, the other held down the paper at the corners, and then switched. This worked pretty well, but it was still challenging. The poses they came up were pretty hilarious.
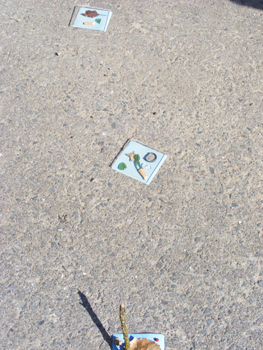
After each group had done their print, we laid them away face down, and I waited until after they had all gone to rinse them and lay them out. I had brought enough small paper for each student to do two prints, and since there was a fire drill, we only did one, so I sent the extra paper home with them.

As they left, everyone said how much fun they’d had, and so I’d say that the class was a success. The only thing that I would change was the wind.
If you are doing Sunprints with a group, here are a few things to remember:
-have a wide variety of objects to print
-individual sunprints don’t take very long, but planning them out can; it’s helpful to have access to both sun and shade so they can prepare before printing.
-check the weather when planning your event!
Tags: Class Activities, Master sheets